
So after little over a year of marriage my husband and I are finally getting our long awaited reception. We had been wanting to do a 1950’s rockabilly wedding but it was out of the question since we were on a 4 thousand dollar shoe string budget for over a hundred people and at least 1500 of it was ear marked for the honeymoon.
We then decided that we would do a WWII themed wedding before finally settling on a an early 40’s home front shabby chic vibe.
After collecting china,crystal, random bits of lace,and burnished metals for about 8 months I decided to get started on my invitations. It seemed like while there were literally thousands of invites to choose from online none had that real vintage feel. (At least not in our price range.) So being the crafty person that I am I decided that I was going to try my hand at making my own. I mean,how difficult could it be?
Well that depends. One it depends on how good you are at beg, borrow or stealing whatever you need and two it depends on how fancy you want to go.
Since my hubby and I had decided on Shabby chic invitations I decided to do a Google search to see what was out there and get some ideas. Talk about information overload! I think it took me about 2 weeks of looking at cards before I found just what I was looking for.I found them on Etsy at a shop called Shabby Scrap. They were amazing!
Let me state that if I could have afforded to get my invitations from them I would have. They have a gorgeous authentic feel and look to them that try as I might I was not able to completely imitate.They are in my opinion the best source for Authentic couture shabby chic invites on the WEB.
Ok so getting started the first thing that I had to decide on was what kind of card shape and size I wanted. I already knew that I was going to have at least 3 inserts so I knew I wanted to have a card with pockets. I settle on these.
I got them in Harvest Gold and at 80 cents a piece I was well on my way of staying under$ 2.50 an invitation. You can find them at http://www.cardsandpockets.com/verticoPocketInvitationantiquegold-2.aspx
To simulate the writing on the original card I decided to go with a stamp from Michaels.
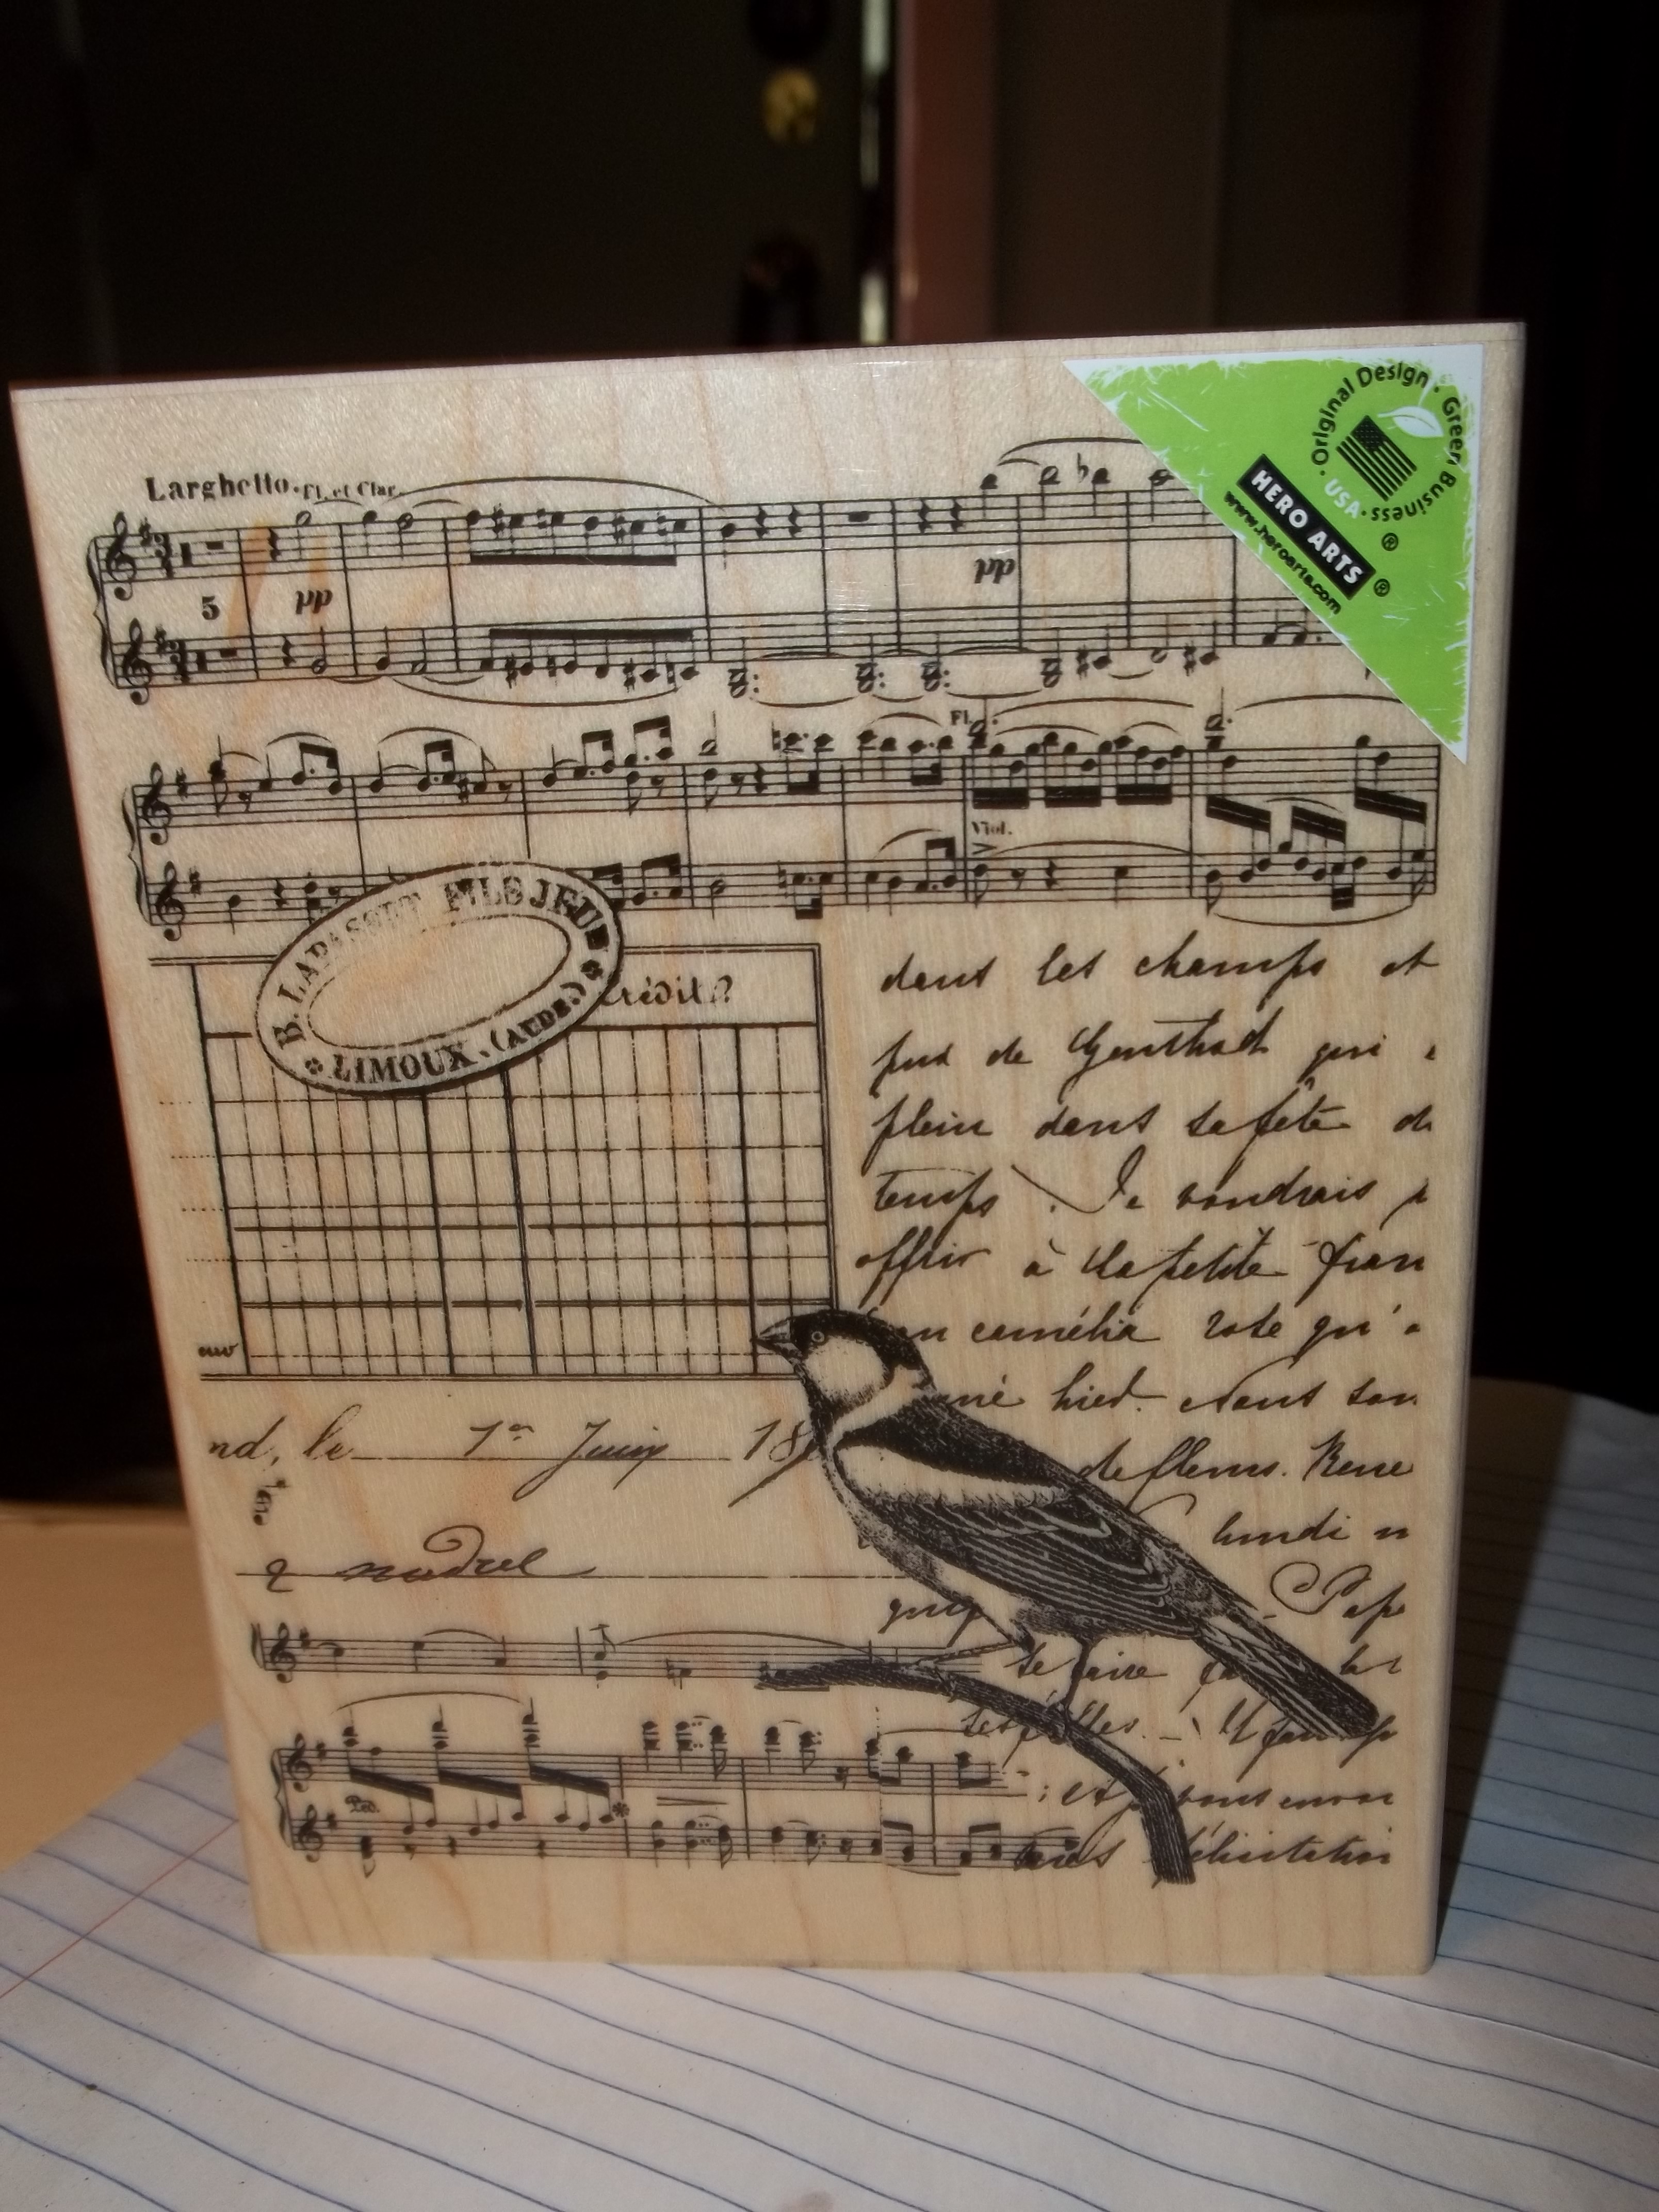
I used a 50% OFF Coupon I had and got the $9.00 stamp for $4.50. I really love the music that is incorporated into the stamp. My husband and I are both musical so this really represented us as well as the theme of the wedding.
To apply the stamp to the card stock I used a special slow drying embossing ink called TOP BOSS! Let me tell you this little ink blotter may not look like much but it handled all 50 of my invitations without even breaking a sweat and for about 2 bucks after my 50% off coupon it paid for itself.

After blotting the entire stamp with the ink, I firmly pressed the stamp into the card making sure to apply firm even pressure over all of the stamp.

At one point I even fliped the card and started to run a book over the card covered stamp which gave me a more detailed picture.
When you remove the stamp it should look like this .
.
If you look closely you should be able to see the faint clear stamp on the card.
Before the ink drys out sprinkle super fine embossing powder over the stamp.

Make sure that if your stamp has a lot of detail that your embossing powder is super fine or rated for detail.
Again I used reflections from Michaels since I had a 50% off coupon

Super fine embossing powder
Make sure that you cover the entire card so that the powder covers all of the the embossing ink. When you are done it should look like this.
When it is completely covered gently tip the card onto the paper sheet and pour back into your powder jar. If you are good and careful you can make this one jar last a long time. I got 50 invitations and 50 initial cards out of about half of a jar.

Remember that until you heat the powder and set it the picture can still be smudged so be careful as you handle the card. If you find any stray powder either blow it away or use a soft paint brush to remove it.
It should look like this. Kind of grainy and matted.
From here you’re wanting to get your heat gun. I have looked online and they range anywhere from 15-40 dollars depending on where you by them. I used a 40% coupon from Michaels and bought mine for about $12.50.
Make sure that you keep the heat at least 2 inches from the paper or else you risk the chance of burning the paper or melting the ink of your detailed stamp into a shapeless blob.

As you move the heat gun over the grainy powder you will see it almost fizzle as it suddenly melts and becomes shiny and raised.
It should look like this when you have heated it correctly
Now that we are finished with the hard part we can move on to the over flap wher the majority of the detail will be.
In keeping with the shabby chic theme, I wanted to incorporate some kind of lace doilie into the invitation. I found these amazing paper doilies at Walmart for 2.99 for a pack of 30 and thought they would be perfect.

It only took a few drops of hot glue to fix them to the top fold over flap of the card


As you can see the Dollie is a little bit big for where I wanted to put it but by folding it over it not only looks lovely but gives the back a bit of pizaz as well.
In the original I really liked how they used ribbon and flowers. I wanted the look without copying exactly so I decided to change the shape of the ribbon and change the flower from paper to silk.
I layered the green silk ribbon on the silk flower petal then the strand of pearls.

I added a pearl button and then just kept adding “fluff” until I liked how it looked.

Here is the finished product. Not bad if I do say so my self 🙂
Here is the inside which I had a lot of help tweaking. Thanks Andi!Over all each card came out to about $2.30 piece. Go ME! 
The inserts BTW were done on a home computer and printed at Target copy for about $20 bucks.
Well that’s it! I hope you enjoyed this weeks Vintage DIY wedding invitation tutorial. Please leave a comment to let me know what you thought.

